Discover the ultimate guide to FDM 3D printing, covering materials, post-processing, manufacturing methods, design guidelines, and care tips to ensure project success. We have created this to provide you with a solid foundation in the essential aspects of 3D printing and prototyping. With abundant information available on this subject, we have focused on key points that will help you gain a basic understanding of the crucial parameters to consider when utilizing our 3D printing services.
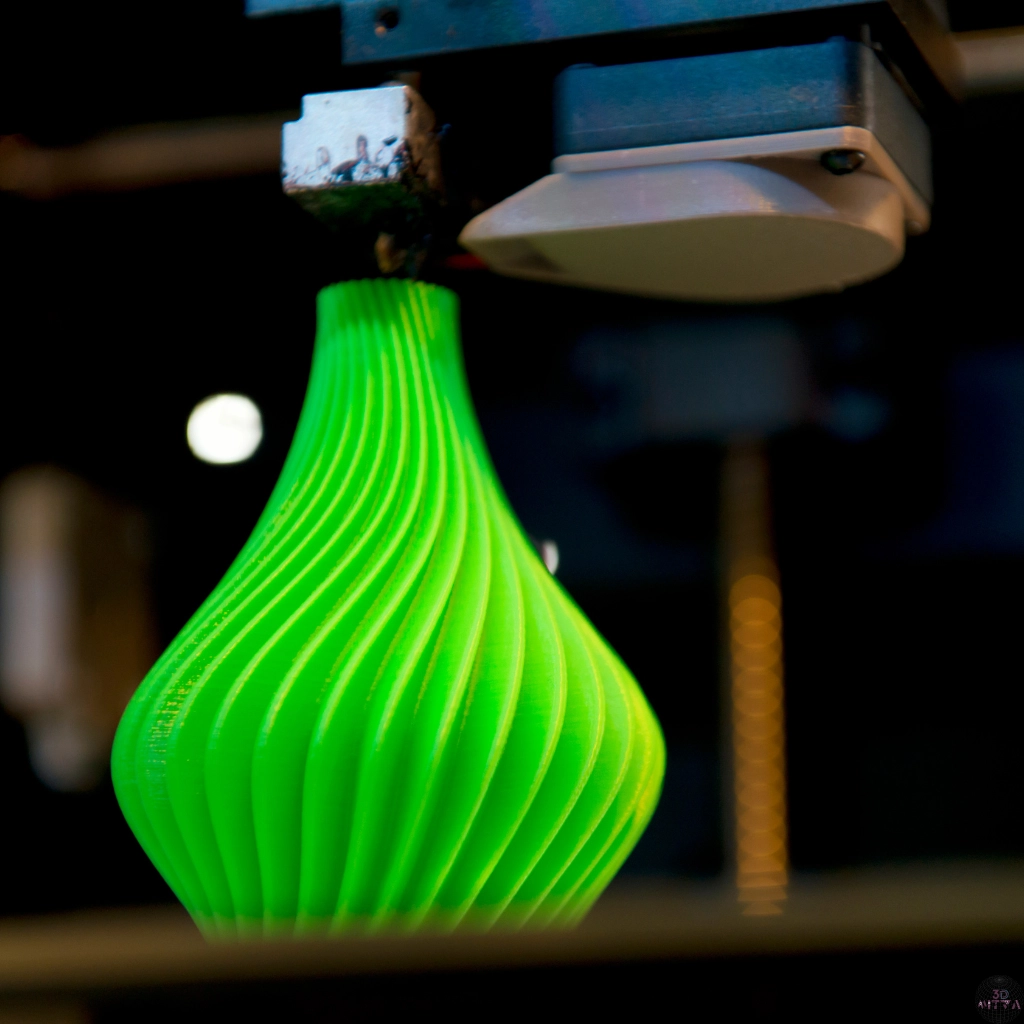
Fused Deposition Modelling (FDM) is an additive manufacturing technology used for production of 3D printed objects. The process involves extruding thermoplastic filament through a heated nozzle, which deposits the material layer by layer to build up the final object. FDM is widely used due to its cost-effectiveness, ease of use, and versatility in creating complex geometries.

Print resolution refers to the level of detail and smoothness of the printed object, determined by layer height and XY resolution.

Infill refers to the internal structure of the 3D printed object, affecting its strength, weight, and print time.
Overhangs occur when parts of the print extend outward beyond the previous layer without direct support underneath.

Supports are temporary structures that hold up overhanging parts during printing.
By understanding these fundamental aspects of FDM 3D printing, you can optimize your designs and achieve better print quality.
Explore a comprehensive guide to selecting the perfect material for your FDM 3D printed product. Learn about the properties, application and drawbacks of different materials to find the best fit for your needs.
| Material | Properties | Application | Drawbacks |
|---|---|---|---|
PLA+ |
Biodegradable, durable, good chemical resistance, low thermal resistance |
Prototyping, educational projects, personalized consumer goods |
May deform under high temperatures |
PETG |
Strong, flexible, good chemical resistance, moderate thermal resistance |
Functional parts, mechanical components |
Susceptible to scratching and wear over time |
ABS |
Tough, impact-resistant, good chemical resistance, moderate thermal resistance |
Automotive parts, electronic housings |
Prone to fading or discoloration in prolonged sunlight |
ASA |
UV-resistant, durable, good chemical resistance, moderate thermal resistance |
Outdoor fixtures, automotive parts |
May become brittle in extreme cold conditions |
Silk PLA |
Glossy, smooth finish, biodegradable, low thermal resistance |
Aesthetic and decorative objects |
Limited color options may not suit all designs |
Wood PLA |
Wood-like appearance, biodegradable, low thermal resistance |
Decorative items, architectural models |
Requires special care to avoid warping or cracking |
Fluorescent PLA |
Glows under UV light, biodegradable, low thermal resistance |
Toys, safety signs, novelty items |
Glow effect may diminish over time with exposure |
TPU |
Flexible, abrasion-resistant, good chemical resistance, low thermal resistance |
Flexible hinges, protective packaging, anti-vibration products, automotive instrument panels, rc wheels, sporting goods, medical devices fixtures |
Limited color options may not suit all designs, difficult to post-process |
Nylon |
Strong, flexible, good chemical resistance, moderate thermal resistance |
Mechanical parts, functional prototypes |
Absorbs moisture, may swell or distort in humid environments |
Polycarbonate |
High strength, heat-resistant, good chemical resistance, high thermal resistance |
Automotive, aerospace components |
Prone to yellowing or hazing over time with UV exposure |
Carbon Fiber Reinforced Filaments |
High strength, lightweight, good chemical resistance, high thermal resistance |
High-strength applications |
Higher cost compared to other materials |
Discover how to improve the durability, appearance, and functionality of your prints with our post-processing and coating techniques. These options are available upon request for an additional cost.
| Material | Post-Processing Options | Coating Options | Additional Notes |
|---|---|---|---|
PLA+ |
Sanding, painting, polishing |
Clear coat for added durability |
PLA+ is easy to post-process due to its smooth surface |
PETG |
Sanding, painting, polishing or vapor smoothing |
Clear coat for added durability, UV-resistant coatings |
Vapor smoothing can provide a glossy finish |
ABS |
Sanding, painting, acetone vapor smoothing |
Clear coat for added durability, UV-resistant coatings |
Acetone vapor smoothing can give a glossy, smooth finish |
ASA |
Sanding, painting, acetone vapor smoothing |
Clear coat for added durability |
ASA is particularly suitable for outdoor applications |
Silk PLA |
Sanding, painting, polishing |
Clear coat for added durability |
Silk PLA provides a glossy finish suitable for decorations |
Wood PLA |
Sanding, staining, painting |
Clear coat for added durability |
PLA Wood can be treated similarly to natural wood |
Fluorescent PLA |
Sanding, painting, polishing |
Clear coat for added durability |
Fluorescent PLA offers unique visual effects under UV light |
TPU |
Sanding, painting, polishing |
Clear coat for added durability |
TPU’s flexibility may require specific post-processing |
Nylon |
Sanding, dyeing, vapor smoothing |
Clear coat for added durability, moisture-resistant coatings |
Nylon absorbs moisture and requires careful handling |
Polycarbonate |
Sanding, painting, polishing |
Clear coat for added durability |
Polycarbonate offers high durability but can be prone to warping |
Carbon Fiber Reinforced Filaments |
Sanding, painting, polishing |
Clear coat for added durability |
Carbon fiber filaments are abrasive and may require special care. |
Compare the benefits and limitations of FDM 3D printing with various traditional and advanced manufacturing techniques. This guide will help you make the best choice based on your specific application, production volume, material needs, and budget. The “other manufacturing techniques” referenced in the comparison table include a range of traditional and advanced manufacturing methods viz. CNC machining, injection molding, laser cutting, sheet metal fabrication, additive manufacturing (SLA, SLS, DMLS), and vacuum forming.
| Aspect | FDM 3D Printing | Other Manufacturing Techniques |
|---|---|---|
Speed |
Relatively fast for prototyping and small-scale production. |
Speed varies depending on the technique but can be faster for mass production. |
Cost |
Low cost for prototyping and small production runs. |
Costs can be higher for tooling and setup, but lower for large-scale production. |
Design Complexity |
Good for complex geometries and intricate designs. |
Some techniques have limitations on design complexity. |
Customization |
Easily customizable with minimal setup time. |
Customization may require significant retooling and setup. |
Environmental Impact |
Can be more environmentally friendly due to reduced waste (only uses material needed for the object). |
Some techniques produce more waste or have higher energy consumption. |
Material Variety |
Wide range of available materials, including plastics, composites, and even some metals. |
Limited materials available, depending on the technique. |
Surface Finish |
Typically rougher surface finish compared to other techniques. |
Other techniques can achieve smoother finishes with less post-processing. |
Strength and Durability |
Parts may be weaker or less durable compared to parts made with other manufacturing methods. |
Other techniques may produce stronger or more durable parts. |
Accuracy and Precision |
Lower accuracy and precision compared to some other techniques. |
Higher accuracy and precision achievable with some other methods. |
Scalability |
Limited scalability for large-scale production due to slower printing speeds. |
Other techniques may offer faster production rates for large volumes. |
Post-Processing Requirements |
Often requires post-processing for surface smoothing or support removal. |
Some other techniques may require less post-processing. |
To help you create high-quality, printable designs, we’ve compiled key design practices and software recommendations. These guidelines will enhance your 3D printing workflow and ensure successful outcomes.
| Category | Complexity | Support Structures |
|---|---|---|
Design for Additive Manufacturing (DFAM) | Leverage the freedom of 3D printing to design intricate geometries that traditional manufacturing methods cannot achieve. | Minimize overhangs and use support structures only when necessary to reduce post-processing efforts and material usage. |
| Category | Overhangs | Support Structures |
|---|---|---|
Optimizing Supports and Overhangs | Design angles less than 45 degrees where possible to minimize the need for supports. Consider chamfering or adding fillets to sharp angles to improve printability. | Position support structures strategically to minimize contact with visible surfaces and facilitate easy removal. While we address this during the slicing process, it’s advisable to consider this aspect in your designs if they include built-in supports, as it enhances print quality. |
| Category | Minimum Wall Thickness | Tolerances |
|---|---|---|
Wall Thickness and Tolerances | Ensure features such as walls and details meet the minimum printable thickness for your chosen printing technology to maintain structural integrity. | Account for tolerances in your design to ensure parts fit together correctly, considering factors such as shrinkage and layer adhesion. |
| Category | Fillet | Chamfer |
|---|---|---|
Fillet and Chamfer | Use fillets to round off sharp edges and corners, which reduces stress concentrations and improves printability. | Add chamfers to edges to facilitate bed adhesion and reduce the likelihood of warping. |
| Category | Tinkercad | Fusion 360 | SolidWorks | Blender |
|---|---|---|---|---|
CAD Software | A beginner-friendly online CAD tool for simple 3D modeling tasks, ideal for quick prototyping and educational purposes. | A powerful modeling tool from Autodesk, suitable for both beginners and advanced users, with parametric design capabilities. | Widely used in engineering for its robust modeling features and assembly capabilities, ideal for creating complex parts and assemblies. | A versatile open-source 3D modeling software for creating detailed models, supporting various file formats. |
| Category | Meshmixer | Netfabb |
|---|---|---|
Mesh Repair & Design Validation | A versatile tool from Autodesk for repairing and modifying 3D models, fixing common mesh issues to ensure a watertight model suitable for printing. It does have a questionable long term support though. | Provides advanced analysis and repair tools for 3D models, including wall thickness analysis, part nesting, and support generation, ensuring your designs are optimized for manufacturing and is a recommended tool if you are looking to make 3d printable designs. |
Students and educators can obtain free one-year access to Autodesk products and services, with the option to renew as long as eligibility is maintained.
By following these design guidelines and utilizing recommended software tools, you can optimize your 3D printing process and create high-quality, 3D printable designs with ease. Feel free to reach out if you need further assistance.
To ensure the longevity and quality of your 3D printed objects, follow these essential maintenance and care tips.
| Category | Tips |
|---|---|
Cleaning |
|
Storage |
|
Handling |
|
Repairs |
|
Post-Processing |
|
Environmental Factors |
|
Regular Inspections |
|
Usage Considerations |
|
By following these maintenance and care tips, you can significantly extend the life and functionality of your 3D printed objects.
If you have any questions or need further assistance, please feel free to contact us. We are always happy to help and provide any additional information you may need.
Fill out the form below and connect with our 3D Printing experts today!

We’re your creative partners in 3D printing. From custom manufacturing to prototypes, we serve diverse fields with excellence.
3D Mitra 2023 © All Rights Reserved.